Some text to describe RoundCube and its features.
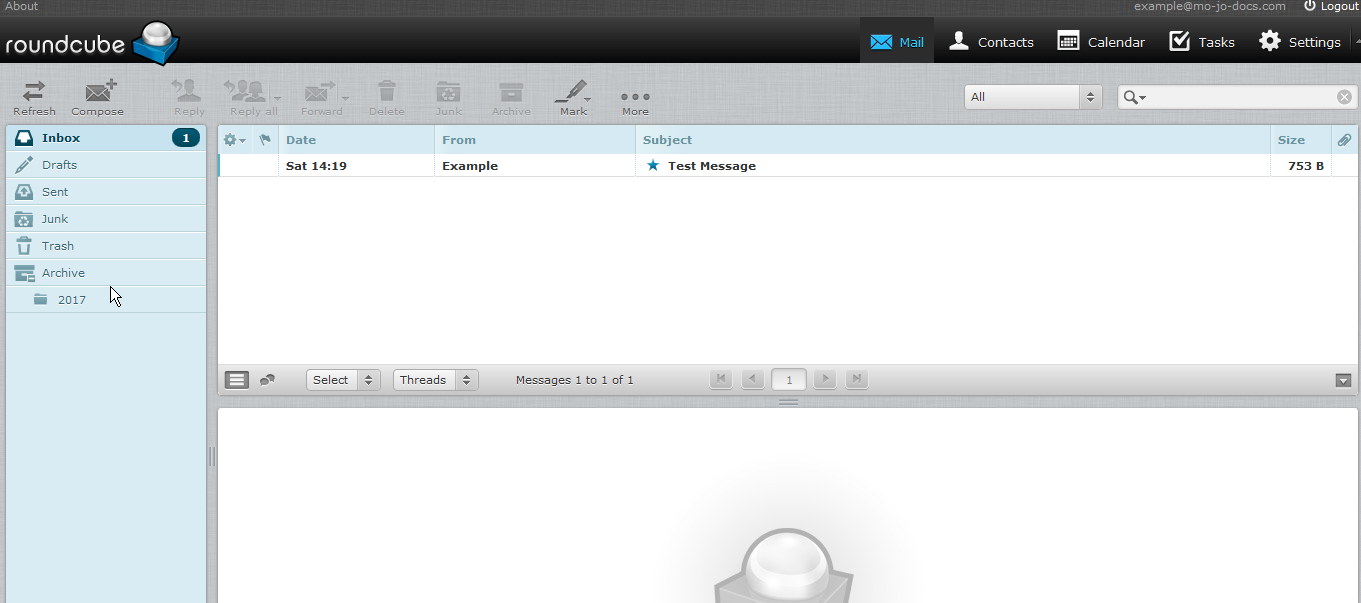
This will be your initial mailbox to where your next step will be to setup your folders. Please refer to the [[SetupFolders | Setting Up Your Folders]] for additional information.
Setting preferences for the User Interface allows you to change various settings that control the behavior and look of your webmail.
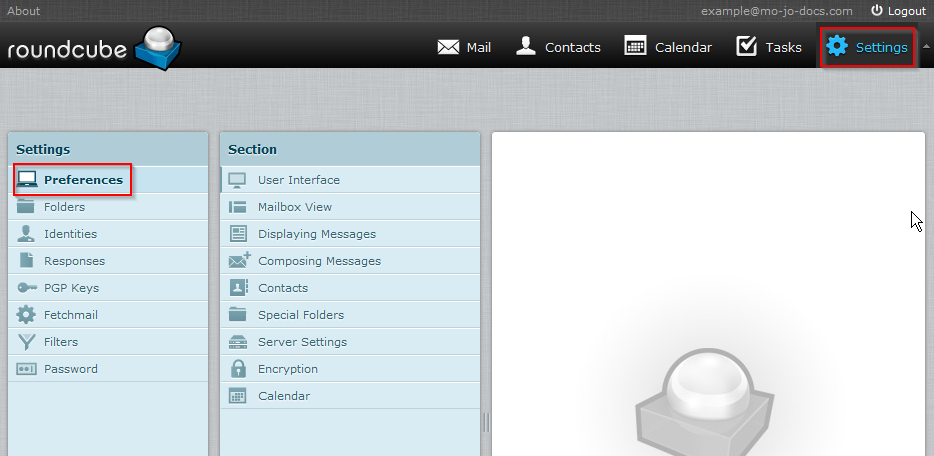
Click on Settings then click on Preferences as shown in the image above.

{{Settings_Folders.png}}
Click on Settings then click on Folders as shown in the image above.
There are two ways in which you can update your folders:
Either option will take you to this screen for setting up your correct folders:
The Inbox folder has already been created as the default.
Your folder list must consist, at a minimum, the following folders, which should never be deleted
Note: Archives can optionally have sub-folders, example, Meeting Emails.
{{SettingsFolders2.png}}
To create a new folder:
{{SettingsFolders3.png}}
Enter the Folder Name, leave the Parent Folder blank, unless you are creating sub-folders under Archives. The Archives folder is the only folder where you can optionally create sub-folders. The Inbox, Drafts, Sent, Junk and Trash DO NOT have sub-folders. Click Save to Save the new folder.
Repeat this step for creating the remaining folders. After you have completed adding each folder, your basic folder list should consists of:
{{SettingsFolders4.png}}
{{SettingsFolders5.png}}
Click on the Mail icon on the menu bar to return to your mailbox.
{{SettingsFolders6.png}}
Your mailbox should look like the above image.
{{SettingsPrefUser1.png}}
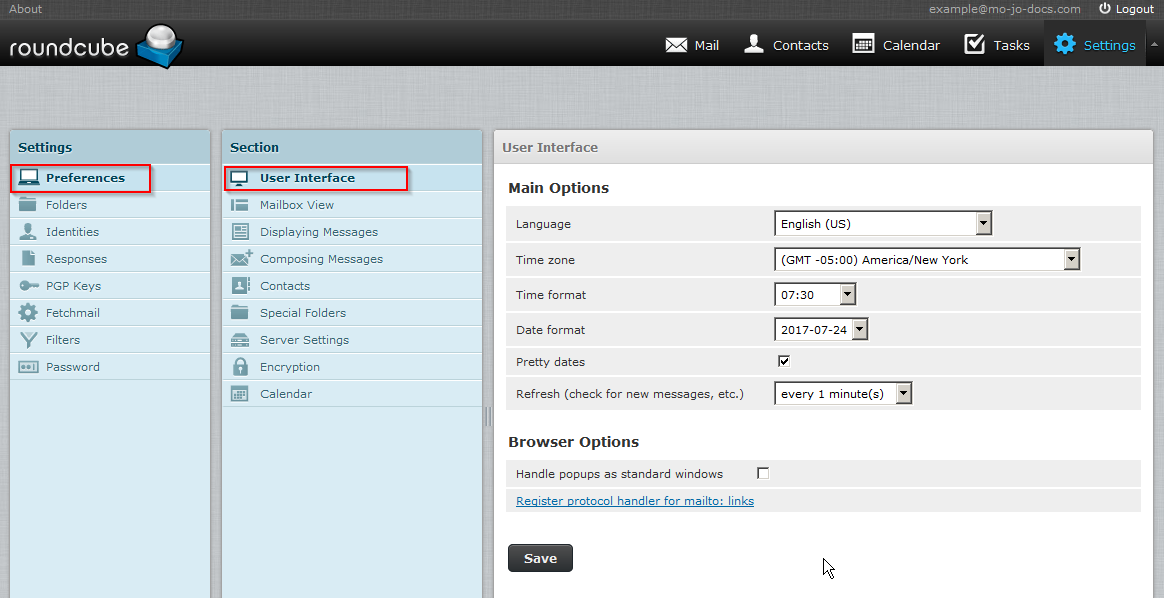
On the Preferences tab, click on User Interface in the left panel. The following lists the options to which you can change values:
The webmail is available in numerous languages. When accessing the webmail application, the language is automatically set from your computer's operating system language. You can change this value by selecting from the drop down list.
Anywhere that dates are displayed will be automatically translated into your local time zone. If you leave this option to "Auto", the system uses your computer's time zone settings. You may change this value by selecting a specific time zone from the drop down list.
Select how time (hours, minutes) are displayed.
Select the format how dates should be displayed.
With this option checked, dates close to today will be translated into relative terms like “Today”, “Yesterday”, etc.
Set the frequency that you want the system to check for updates (e.g. for new messages arrived).
Choose the visual appearance of the user interface from a selection of themes.
You can register this webmail application to be opened whenever you click an email link somewhere on the web. As an example, when you are on a webpage and you click on an email address, this webmail application is added to the available email clients where you can launch the application.
Depending on the browser that you are using, the information for registering and adding the webmail application may be different. For purposes of this documentation, Mozilla Firefox was used. Please refer to your browser documentation for further details.
{{settingsprefuserbo.png}}
Once you click on the Register protocol handler for mailto: links, you will be asked by your browser to add the application. If you click on Add Application box, on the top, right of your screen, RoundCube will be added to the Launch Application list as shown below. If you click the X to the right of the Add Application box, you can choose not to add the application.
This image is an example of what your browser will display if you have added RoundCube to the application launcher when clicking on an email link within a webpage:
{{settingsprefuserla.png}}
Click on the Save box to save your changes.
{{settingsprefmailboxview.png}}
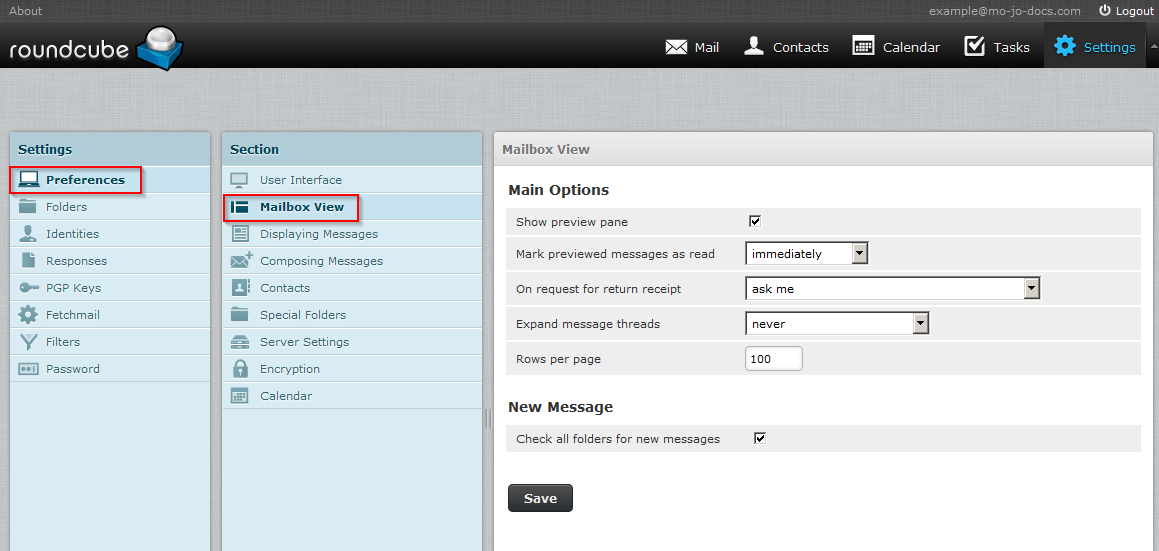
On the Preferences tab, click on Mailbox View in the left panel. The following lists the options to which you can change values:
This shows or hides the //preview pane// in the mail view.
Select the delay interval to mark new messages as "read" when opening messages in the preview pane. Click on the drop down arrow to view and/or change delay interval. Valid selections are:
This option controls the action to be taken when you open a message and the sender has requested a receipt when you read the message. Valid selections are:
This option controls how conversation groups are expanded in the list when listing messages in //threads//.
The message list will display this number of messages per page. Increasing this number may result in longer loading times when opening your mailbox folder.
Click on the Save box to save your changes.
{{settingsprefdisp.png}}
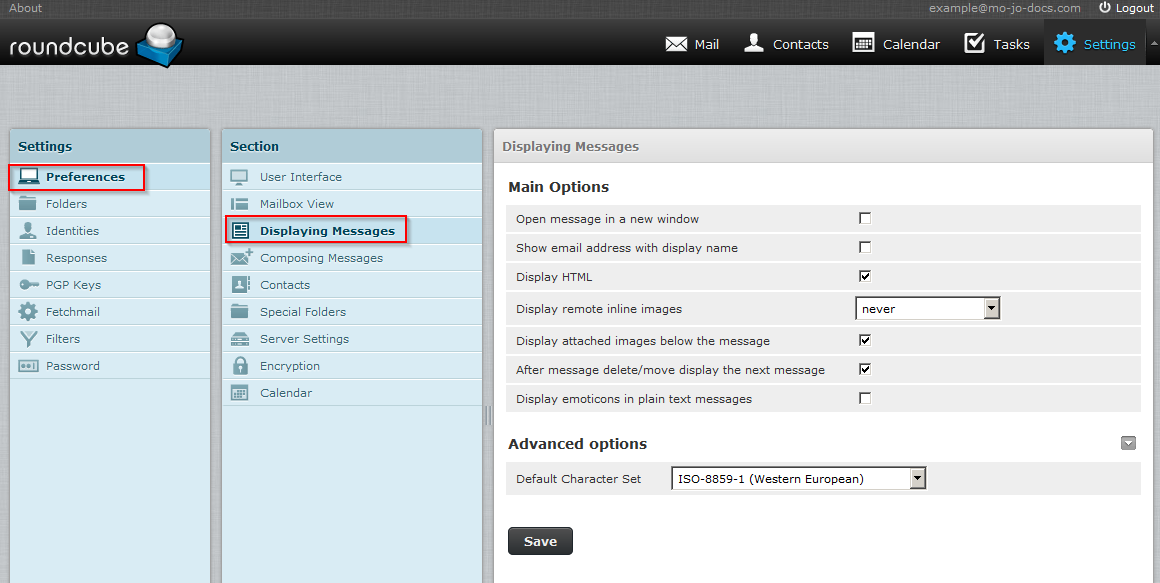
On the Preferences tab, click on Displaying Messages in the left panel. The following lists the options to which you can change values:
With this option checked, double checking the message in the email view will open the message in a new window instead of the current browser window/tab.
Check this option to display formatted messages as the sender intended it. When disabled, formatted emails will be converted to plain text.
Formatted (HTML) messages can contain references to images which have to be loaded from a remote server. That can harm your privacy and reveal to the sender that you opened the message. This technique is often used by spammers to verify that your email address works and you can be sent more spam.
Check this option if you want image attachments being displayed below the message text.
This option controls whether the screen should continue to the next message in the list when opening an email message (not in the preview pane) and then move or delete it.
Click on the Save box to save your changes.
{{settingsprefcomp.png}}
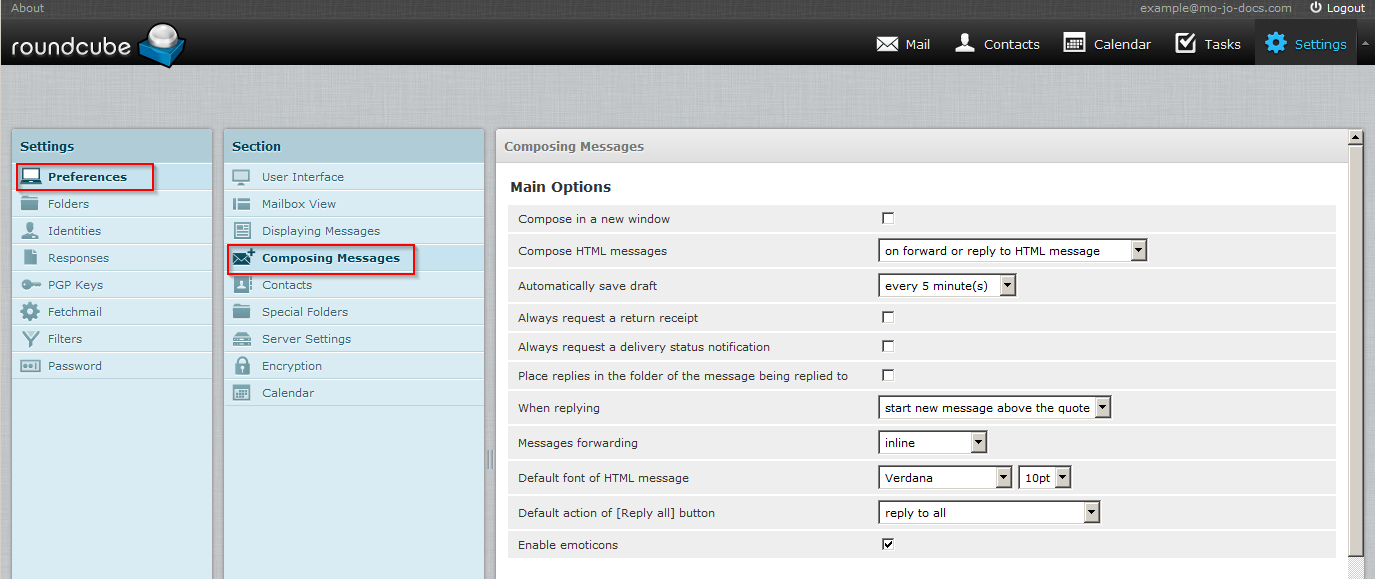
On the Preferences tab, click on Composing Messages in the left panel. The following lists the options to which you can change values:
Main options
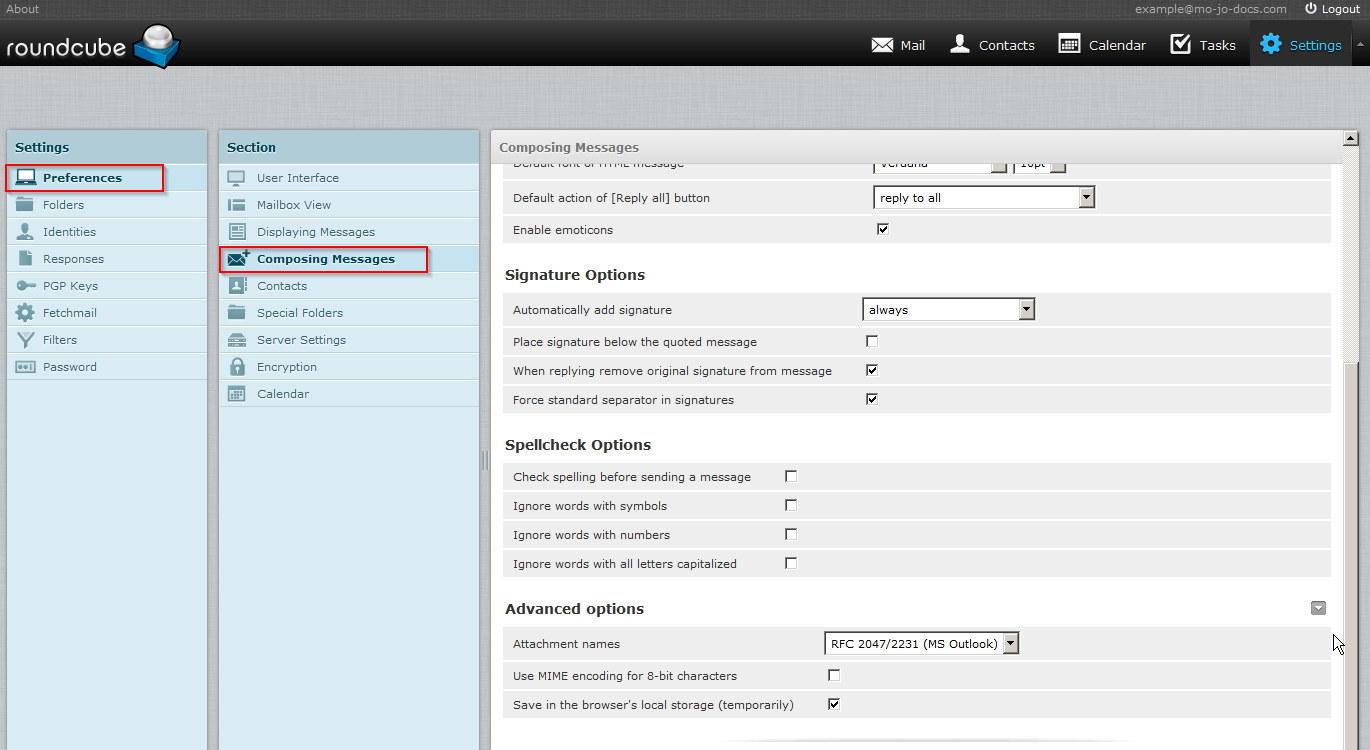
Signature options
Spellcheck options
Click on the Save box to save your changes.
On the Preferences tab, click on Contacts in the left panel. The following lists the options to which you can change values:
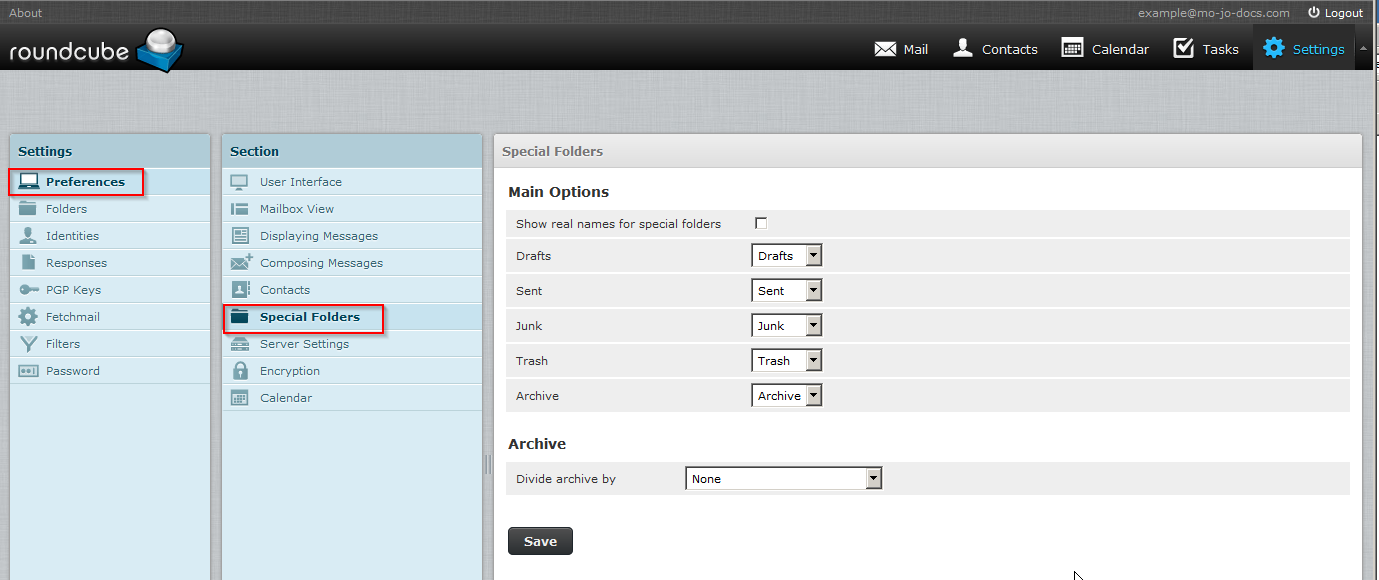
On the Preferences tab, click on Special Folders in the left panel. The following lists the options to which you can change values:
On the Preferences tab, click on Server Settings in the left panel.
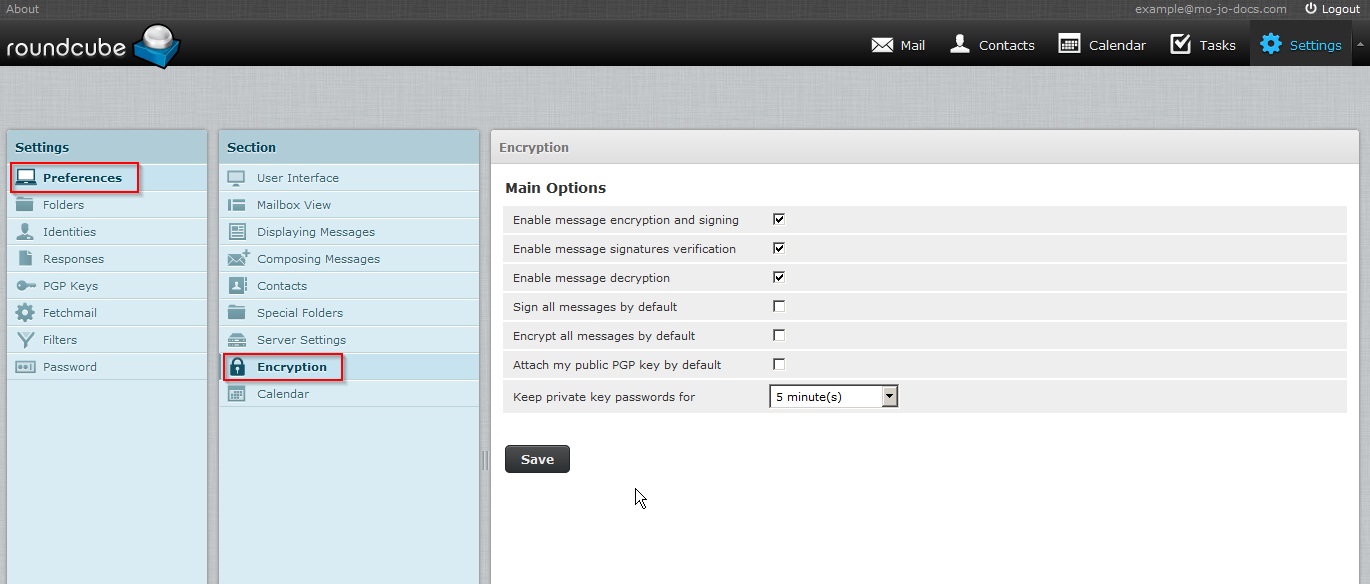
On the Preferences tab, click on Encryption in the left panel.
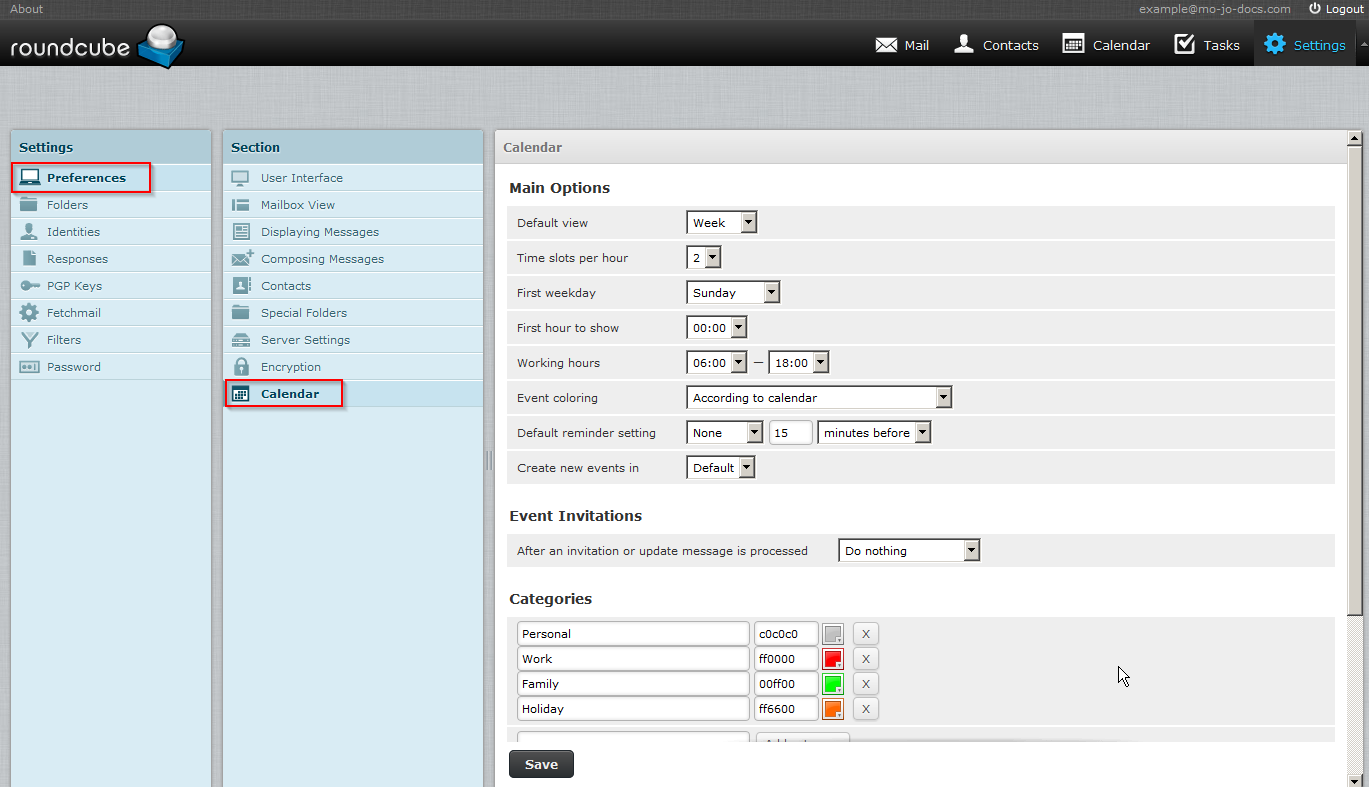
On the Preferences tab, click on Calendar in the left panel.
{{Settings_Folders.png}}
{{Settings_Identities.png}}
{{Settings_Fetchmail.png}}
{{Settings_Filter.png}}
{{Settings_Password.png}}